I started with a cooler I picked up at a flea market for $5. It was a little smaller than what I wanted, which will require I be creative when I later convert it to still be used as a cooler. But it beat the hell out of buying the one I wanted for $50 new. Then I went and picked up (on sale, no less) the marine audio setup I'd decided on. The stereo is bluetooth compatible, so the stereo works as a large wireless speaker, which is awesome. After picking up a deep cycle battery that was made to run a trolling motor, I was ready to go.


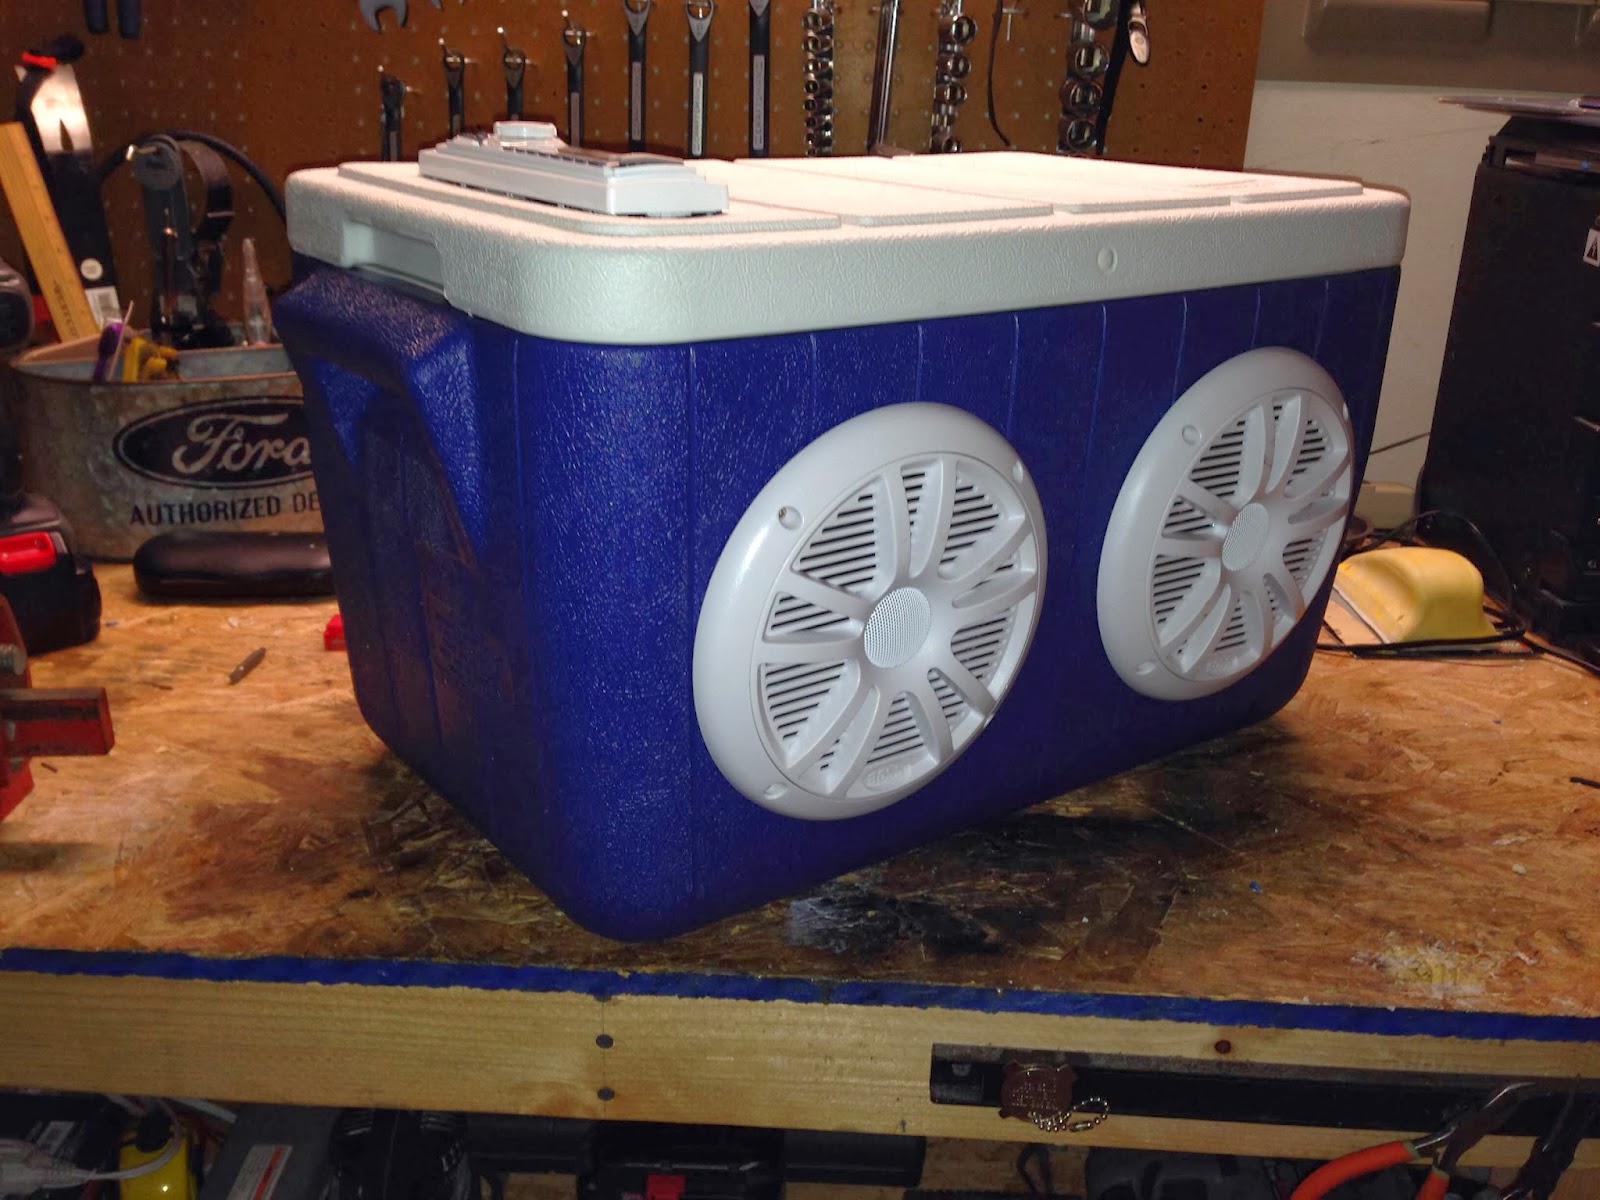
After marking out where I wanted the speakers, I used a paddle bit to make a starter hole and went to town on it with my jigsaw. I didn't take any pictures during the process of putting it together. Once I cut the holes, I mounted the speakers using the included screws. I plugged in the speaker wires and then started the most difficult task of the whole project: deciding where to put the head unit.

I eventually settled on the top of the lid, facing up. This was so I could have access to the controls without having to open the cooler. Also, it would allow the remote to access the receiver. I used some marine-grade epoxy I had left over to mount the frame for the receiver. Because of the way it hanged into the cooler, I had to stagger the battery to the opposite side. I ran the speaker lines to the appropriate length and cut them off so I didn't get too bad a rat's nest in there. I had some 16G wire laying around from a previous project so I ran it to the appropriate length for power (hot, hot switched, and ground). I soldered all the connections and used heat shrink tubing around the joints.


I turned it on and it worked perfectly. Thing is LOUD! Now I just had to do some finishing touches. I had some small L-brackets left over from something, so I screwed them into the bottom to stabilized the battery. Then I added a 12v cigarette lighter-style plug that had a fuse built in. I have a 1 amp battery charger and an extra maintenance charger I'm going to solder a male 12v plug onto for charging through this port. I can obviously use it as a power outlet for charging phones, although the receiver has a USB plug on the front that chargers, as well as an auxiliary input. Today I used it to run a small air pump to fill a tire on my boat's trailer. But mostly I plan on using it to charge.


I plan to use this for tailgating, camping, working around the yard, etc. The original plan was to put cooler anchors on the boat and use it there (old bass boat doesn't have a stereo), but the boat will be going away soon. I'm going to build a small trailer for it so I can tow it around on my bicycle. Like I said before, it's got a bluetooth receiver in the head unit so I can take it just about anywhere and listen to to just about anything. The biggest thing I'm excited about the cooler size is that it fits perfectly in my kayak so I can take it floating or just paddling around the lake.

No comments:
Post a Comment